Kamis, 20 Oktober 2016

What’s in a name


Today being an anniversary of sorts, I wanted to do something special to mark the occasion. It seemed like an appropriate time to order the transom decal for my boat. 

The boat’s name will be “Perseverance.” 

In the 3-1/2 years I’ve been building this Glen-L Utility, the project has bridged some pretty major personal events; dark and painful personal storms including divorce, heart surgery, betrayal and loss... things that at times seemed insurmountable. But, by the grace of God, I have made it through, and healed and grown along the way. 

At some point, watching this boat grow from a few pieces of wood, to a graceful framework, to a painted and righted hull, I realized that the project has been a metaphor for my own growth and healing. “Perseverance” seemed like the perfect name. 

I’ll close this post with a beautiful quote from a very eloquent friend of mine: “If the soul had a form, it would be shaped like a boat.”
Read More..

Selasa, 18 Oktober 2016

And the painting continues

After the fourth coat of Whidbey White, the dark colors of the wood arent showing through. So, the middle section is basically done... except for the sheers, which will be painted Sea Foam Green.


With this section finished, I re-installed the stainless steel grab handle onto frame #2.


It may be hard to discern the difference in the photo... but thats 4 coats of WR-LPU Whidbey White on the right, and only 2 on the left. I didnt see the point in painting 4 coats in the forward area, as it will be covered by the deck.

The next step will be to either begin assembling the seats, or finish applying the 2nd layer of epoxy to the aft section. Im not sure which Ill do.

Aft section needs a 2nd coat of epoxy before painting.
I also found some Sea Foam Green registration decals online & ordered them. I hope theyll match the bottom paint reasonably well.

These are the decals I ordered. Im looking forward to seeing how they look.


Read More..
The first bottom planking panel is on. 1 down, 3 to go. That is the good news, and that is the main point.

Getting there, however, didn’t go quite as smoothly as I’d hoped.

It was a Sunday night, and the pre-fitted panel was off of the boat. Before it got too late, I figured I’d go ahead and glue it down. After all, I would really like to get this boat in the water this year.

One small step was in the way: I still needed to finish encapsulating 3 limbers on frame #1. That takes a different type of epoxy than the stuff needed for gluing. No problem. I had 3 mixing containers.

Ominous foreshadowing #1: Not wanting to waste time, I’d only cleaned two of the three mixing cups.

The encapsulation part went fine. Just a few ounces of System 3 SilverTip. Quick and easy. On to mixing the GelMagic epoxy for gluing.

That went fine, too. That is, until I spread the last of it onto the final remaining inches of the boat frame, realizing as I did so that I had no epoxy left to spread onto the plywood.

Best practice is to coat both mating surfaces. Best practice is to use a clean mixing cup for each batch of epoxy. Now, I had one cup with still-curing SilverTip, one cup I didn’t bother to clean, and the last cup which I had just used.

Since the epoxy on the boat would start kicking off at any minute, I had to make a split-second decision: Either mix more GelMagic in one of the dirty cups, or hope what I’d put on the framework was enough on its own. With best practice being to coat both surfaces, I hurriedly scraped out the GelMagic cup as best I could & hoped there wouldn’t be a problem mixing more in it.

I quickly poured in about the same amount of resin. (That is, as “quickly” as one can “pour” GelMagic.)

I calculated the amount of hardener needed, quickly grabbed the bottle, opened it & upturned it....

...which is when I quickly found out I’d added the wrong hardener. GelMagic hardener is amber in color, and very viscous. This stuff was clear and flowed like water. It was the SilverTip hardener, not the GelMagic, and now I’d just wasted both.

I calmly murmured a string of socially-acceptable phrases, and pondered my next move.

I had more epoxy, but the last remaining mixing cup was full of junk. It still had hardened clumps of SilverTip thickened with mahogany sawdust clinging tenaciously to its inner walls. There was no time to clean it.

So, I made another rush decision & decided to use it. The clumps started breaking free as I mixed the batch of GelMagic. I picked them out as best I could as I spread the epoxy onto the plywood. That in itself added more time to an already urgent task.

It takes a long time to hand-drive 97 screws. It takes longer when you’re having to bend plywood against its will in the process. It took long enough, in fact, that by the time I drove the last screw into place the epoxy was so viscous I could barely manage scraping it with the putty knife. It was also late by this point. I was tired and exhausted.

I was so tired, in fact, that I forgot something very important. I forgot to reach underneath the planking and scrape away epoxy along the battens, where I will need to fit the butt blocks for joining the planking panels. Ugh...

Chipping away at THAT for the last 3 days has been fun, I assure you.

Oh well. The first bottom panel is on, and it is on solidly. That is the good news, and that is the main point.  


With the forward panel removed, this is how I marked the lines to cut butt blocks from a scrap of plywood.

The Utilitys framework & the Zips stem assembly.

First bottom panel epoxied on.

Fitting at the stem.

Transition joint.

My daughters Hello Kitty mirror was a huge help in chipping away at that epoxy.

Read More..

Senin, 17 Oktober 2016

3 9 13 centerboard

I took the plunge today and bought a few board feet of 2X6 fir to start laminating the centerboard.

After an hour on the saw including set up, I have a pile of nice strips to glue up to the basic shape.


The logic to start on this part of the boat was that the garage is still too cluttered and cold for serious building and these parts can be done with the glueing indoors and the shaping outdoors.  The centerboard trunk will be determined by the final shape of this part, so there it is.

Plywood will be ordered next week so it arrives when Im home to receive it!

Read More..

The Water We Eat

One of the things that traveling does is give one a broader perspective on the world than is available from staying in one place.  My recent trip to Kings Canyon National Park was no exception.  One insight I had on this particular trip was about water, where it comes from and where it ultimately goes.
We spent most of a week camping right next to Kings River which drains all the water that collects in Kings Canyon. The river at this time of the year, October, does not carry much water since it hasnt rained all summer and the melt-water from glaciers higher up in the Sierras is minimal. 


Still, he water of the river is cold and clear even late in Summer when temperatures during the day still rise into the nineties.
And as is usual for me when staying in a place for a while, I become curious about it, specifically about the Kings River.  Where does it go?  I dont remember where I got the answer, but the answer is, into a reservoir downstream in the foot-hills of the Sierra from which the water goes to the city of Fresno and to the surrounding farmland for irrigation. And so, the water of the river next to which we camped never reaches the ocean. And even before the reservoir was built and before the land in the valley was farmed, the river seldom reached the ocean. Most year it drained into the shallow Tulare Lake which most years had no outlet. Only in unusually wet years did the water of the lake overflow into the San Joaquin River which flows into San Francisco Bay.
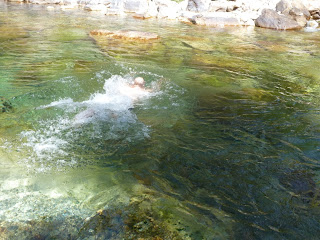
But now, the Kings River irrigates farm land and the water that first fell as snow in the Sierra Nevada range ends up in almonds, peaches, plums, oranges and other produce, much of which is trucked out of the state via interstate highways and gets consumed far from its origins by people who have no clue that the water in the peach that they are eating may have also cooled my body on a hot day in October.


Read More..

Minggu, 16 Oktober 2016

Quarter knees cut fitted

Today I cut out the quarter knees from a piece of mahogany. I used the transom knee from the Glen-L plans as the basis for the shape. However I had to change the corner angle to match.

Using my angle finder, I determined the transom-to-sheer corner angle to be 110°, or a 10° outward rake. (The keel-to-transom rake is 12°). Of course, theory is all fine and good... I drew it, I cut it, I planed it. I still had to re-cut it to fit. Cest la vie.

With another angle-finding tool, I determined that the vertical rake from the transom to the midline of the sheer was about 5°. So, I adjusted my planer/jointer to 5° and planed the edge of the knee that will mate to the transom. Happily, it worked great the first time. 

A little minimal corner-cleaning with a chisel, and everything fit great. Repeat for the other side.

Ive also heard these pieces referred to as "corner knees." Whatever the proper term is, I still need to finish sanding them.


Mahogany port quarter knee
Port quarter knee.

Starboard quarter knee.

This is where Im planing to install the rear cleats.


Read More..

Sometimes its the obvious things

I reserve the right to change my mind.

Yesterday, Id decided to just leave the globs of cured epoxy sandwiched between the chines and stem as-is. They were hard to reach, and it seemed like it was going to take me forever to make any real progress on them. So, I thought Id just write them off as large, malformed, out-of-control fillets. 

That was before I discovered the obvious: 

A chisel is very effective at removing cured bits of epoxy.

Certainly it will do it faster than sandpaper or files, which are of course still needed to smooth the surface. For what its worth, I noticed that the epoxy Id thickened with #2 silica is more brittle and breaks away easier than the epoxy Id thickened with mahogany sawdust.

So, with chisel in hand, I once again attacked the biggest glob of epoxy, which is behind the starboard chine. After making a bit of progress with the chisel, I filed away aggressively with a coarse round file. A little more work, and Ill have it reduced to something more acceptable.

Sure, it will still be a large fillet. But it wont be so malformed and out-of-control.

So with that, Ive made a blog post each day this week. I suppose its a fairly representative week in the slow-but-steady progress Im making on the Utility. God willing, Ill be able to put the little boat in the water this year.
Read More..